How to Clean a Car Interior Without Harsh Chemicals
Table of Contents
- Why Harsh Chemicals Are a Problem in a Car Interior
- What You’ll Need: Car Interior Cleaning Tools and Supplies
- DIY Car Interior Cleaner Recipes With Exact Dilution Ratios
- Step-by-Step: How to Clean a Car Interior Without Harsh Chemicals
- Cleaning Car Seats Naturally: Fabric, Leather, and Upholstery
- Choosing a Non-Toxic Car Interior Cleaner You Can Trust
- Odour Removal, Mould, and Allergens in a Car Interior
- Common Mistakes and a Simple Maintenance Schedule
- Frequently Asked Questions
Last Updated: October 14, 2026
Why Harsh Chemicals Are a Problem in a Car Interior
Your car’s cabin is a small, sealed space that heats up fast, so harsh cleaners release fumes that linger.
Plenty of drivers want a fresh cabin without the smell of a workshop. This guide shows you how to clean a car interior without harsh chemicals, using simple ingredients you likely already own.
Gentle does not mean weak: with the right dilution ratios, water, vinegar, and dish soap handle almost every surface.
Never mix vinegar with bleach or ammonia-based products. The combination releases toxic gas. Keep your DIY cleaners separate from commercial sprays.
What You’ll Need: Car Interior Cleaning Tools and Supplies
Good tools do most of the work. Gather these before you start:
- Two microfiber cloths (one for cleaning, one for drying)
- A soft brush for vents and seams
- A vacuum with a crevice tool
Microfiber lifts dust and dirt instead of pushing it around, while cheap cloths smear grime across hard surfaces. For car interior cleaning tools, stick to soft bristles and non-scratch cloths, stiff brushes scratch plastic and pull at upholstery.
Keep one microfiber cloth damp and one dry. Wiping with a damp cloth, then drying straight away, stops streaks on glass and shiny plastic.
DIY Car Interior Cleaner Recipes With Exact Dilution Ratios
A DIY car interior cleaner takes a minute to mix and costs almost nothing. The trick is getting the ratios right: too strong risks residue or surface damage, too weak will not cut grime. Here are four measured recipes that work on most surfaces.
All-purpose interior spray (hard plastics, vinyl, painted trim):
- 250 mL warm water
- 5 mL (1 teaspoon) dish soap
- Mix in a spray bottle, swirl gently, do not shake, or you build foam that drips
Glass and window cleaner:
- 125 mL water
- 125 mL white vinegar
- Combine in a spray bottle
Fabric and carpet spot cleaner:
- 250 mL warm water
- 15 mL (1 tablespoon) white vinegar
- 5 mL (1 teaspoon) baking soda
Leather wipe-down solution:
- 250 mL warm water
- 2-3 drops of pH-neutral dish soap (no degreaser, no citrus)
- Apply with a barely damp cloth only
| Recipe | Ratio | Best For | Keep Away From |
|---|---|---|---|
| All-purpose spray | 1 tsp dish soap : 1 cup water | Dashboards, door panels, plastic | Screens, leather, suede |
| Glass cleaner | 1 part vinegar : 1 part water | Windows, mirrors, glass | Touchscreens, coated plastics, leather |
| Fabric spot cleaner | 1 tbsp vinegar + 1 tsp baking soda : 1 cup water | Seats, carpet, floor mats | Leather, electronics |
| Leather wipe | 2-3 drops pH-neutral soap : 1 cup water | Finished leather seats and trim | Aniline or suede leather |
Which Ingredients to Keep Off Which Materials
Match the cleaner to the surface before spraying.
- Vinegar and acidic mixes: safe on glass and most hard plastics, but avoid on touchscreens (the acidic film can degrade oleophobic coatings), on finished leather (it strips the top coat over time), on aluminium or chrome trim (etching), and on any coated plastic with a soft-touch finish.
- Dish soap: fine on vinyl and plastic at the ratios above, but avoid on leather beyond a few drops, and never use a degreasing or citrus-based formula on interior trim, it lifts protective coatings.
- Baking soda: good on fabric and carpet, but do not use it as a paste on leather or screens. The mild abrasiveness dulls surfaces.
Dwell Time and Removal
Dwell time matters as much as the ratio:
- Spray onto a cloth, not the surface.
- Wipe once to lift grime.
- Let the cleaner sit for 20-30 seconds on stubborn marks, no longer on plastic, or it can leave a haze.
- Wipe again with a clean damp cloth to remove residue.
- Dry immediately with a dry microfiber.
Residue is the enemy: leftover soap or vinegar attracts dust and streaks glass and shiny plastic, so never skip the second clean-water wipe. Always patch test on a hidden spot first, under a seat, inside a door jamb, or behind a mat, and wait five minutes before committing to the whole cabin.
Step-by-Step: How to Clean a Car Interior Without Harsh Chemicals
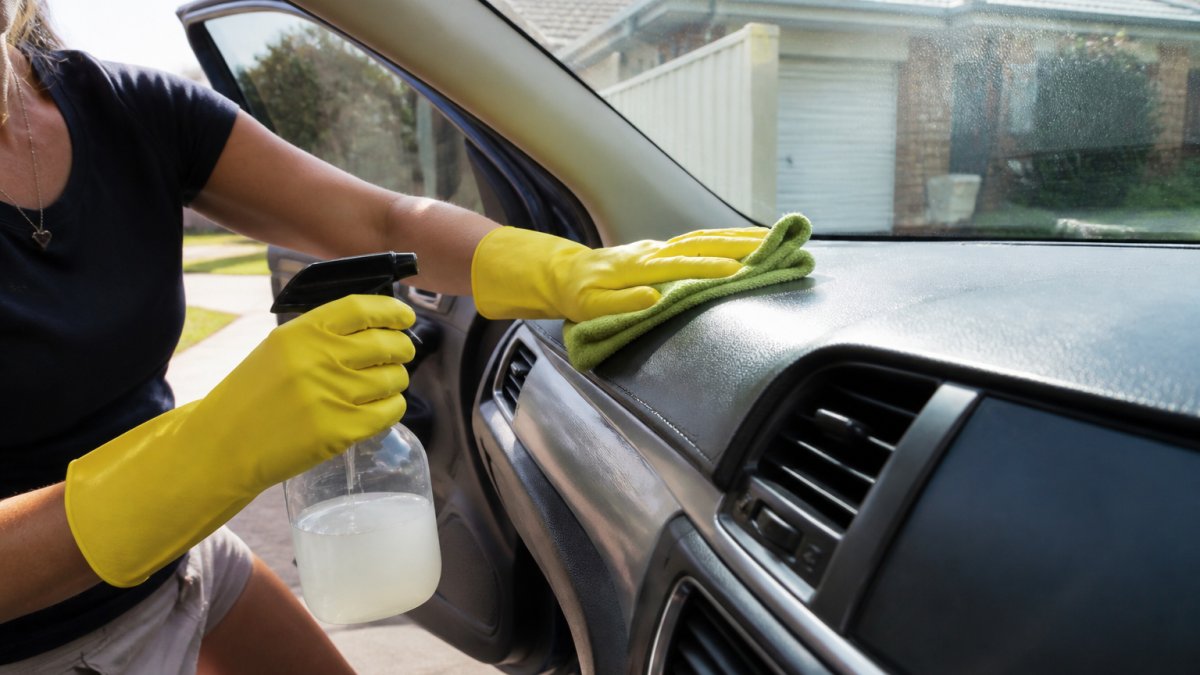
Work top to bottom and dry to wet so dirt does not fall onto surfaces you have already cleaned. Set aside about an hour for a full interior detailing job.
- Remove loose items, mats, and rubbish.
- Vacuum seats, carpet, and floor mats first.
- Dust the dashboard and door panels with a dry cloth.
- Clean hard surfaces with your all-purpose spray.
- Wipe glass and windows with the vinegar mix.
- Spot-clean seats and carpet.
- Dry every surface with a clean cloth.
Vacuum before you wipe. Loose dirt and dust scratch surfaces if you rub them in. This one habit keeps your dashboard and door panels looking sharp.
Dashboards, Door Panels, and Hard Surfaces
Spray your all-purpose mix onto a cloth, not directly onto the dash, direct spray runs into vents and buttons. Wipe in one direction, then dry with a second cloth. For vents and seams, use a soft brush or cotton swab. Avoid soaking hard surfaces; too much moisture can seep behind panels, so a damp cloth is all you need.
Glass, Windows, and Touchscreens
Use the vinegar and water mix for windows and mirrors. Wipe once to clean, then buff with a dry cloth to remove streaks.
Touchscreens and instrument panels need extra care. Never spray liquid directly on electronics. Spray onto a cloth, wring it out, then wipe gently.
- Use a barely damp cloth on screens
- Avoid vinegar on touchscreens; plain water is safer
- Dry immediately to prevent spots
Cleaning Car Seats Naturally: Fabric, Leather, and Upholstery
Fabric seats: Vacuum first, then spot-clean with the vinegar and baking soda mix. Blot, do not scrub.
Leather seats: Wipe with a barely damp cloth and a little dish soap. Dry right away.
Synthetic upholstery: A mild all-purpose spray works well. Test a hidden area first.
For all three, work in small sections. Let each one dry before moving on.
Blot stains, never scrub. Scrubbing spreads the mark and damages fibres. Light pressure and patience win every time.
Carpets, Floor Mats, and Stains
Floor mats take the worst of it. Shake them out, then vacuum both sides. For carpet and mats, use the fabric spot cleaner and a soft brush.
Tackle spills fast, the longer a stain sits, the harder it lifts. Blot with a clean cloth, then air dry fully.
- Shake mats outside first
- Vacuum both sides of each mat
- Spot-clean stains with the vinegar mix
Damp mats trap moisture and cause odours, so always let them dry in the sun before refitting.
Choosing a Non-Toxic Car Interior Cleaner You Can Trust
A non-toxic car interior cleaner avoids harsh solvents, bleach, and ammonia, but “natural” on a label does not always mean safe for every surface.
Here is what to look for:
- Plant-based surfactants instead of strong solvents
- No ammonia or bleach
- Clear dilution instructions
Watch for chemical-free claims. A product branded natural cleaner can still irritate skin or damage leather.
For most drivers, a homemade mix beats a mystery bottle. You know exactly what is in it, and you control the strength.
If you would rather buy ready-made, look for low-fume, plant-based formulas.
“Chemical-free” is a marketing phrase, not a safety guarantee. Check the ingredient list and patch test before use.
Odour Removal, Mould, and Allergens in a Car Interior
Masking smells with air freshener does not fix the cause. For real odour removal, find the source first, and know when surface cleaning will not be enough.
Common culprits include damp carpets, old food, pollen trapped in the vents, and moisture under floor mats. Left alone, damp spots grow mould, which releases allergens and a musty smell that returns every time the cabin warms up.
Find the Source Before You Treat It
Work through the likely sources in order:
- Cabin air filter, pull it out and inspect. A grey, clogged, or damp filter spreads odour through every vent. Replace it when dirty; most manufacturers suggest every 12 months or 15,000-20,000 km, whichever comes first.
- Carpet and underlay, press a dry paper towel into the carpet. If it comes away damp, moisture is trapped below and surface cleaning will not fix it.
- Floor mats, rubber mats trap water underneath; fabric mats hold it in the fibres.
- Seats, spills that soaked into foam can smell for months.
- Air-conditioning drain, a blocked drain line lets condensation pool in the footwell.
A Measured Odour Treatment
Once the source is dry and clean, this sequence works on most cabins:
- Air the car with doors open for 15-20 minutes.
- Vacuum seats, carpet, and mats, including under the seats.
- Wipe down hard surfaces with the all-purpose spray from earlier.
Baking soda absorbs smells well. For persistent odours, repeat the process rather than using a stronger product.
Mould and Allergens: When Surface Cleaning Is Not Enough
Mould needs moisture, so the fix is two-part: remove the growth, then remove the water source.
- Wear gloves and a mask when disturbing mouldy material.
- Wipe hard, non-porous surfaces with the vinegar mix, then dry fully.
- For fabric, vacuum first with a HEPA-filter vacuum if available, then spot-clean and dry completely in the sun.
If mould covers a large area of carpet, underlay, or seat foam, or the musty smell persists after full drying, stop DIY cleaning. Porous materials that stay damp hold mould deep in the foam, where surface wiping will not reach it, so professional remediation, or replacement of the affected underlay or foam, is the appropriate step.
Keeping It Dry
Prevention beats treatment. A few habits keep odours and allergens from taking hold:
- Dry mats fully in the sun before refitting them.
- Do not leave wet towels, swimmers, or drink bottles in the cabin.
- Check the cabin filter at every service.
If a smell keeps coming back, it is moisture, not dirt. Dry the source, replace what cannot be dried, and only then treat the air.
Common Mistakes and a Simple Maintenance Schedule
Most cleaning damage comes from good intentions and the wrong method. Avoid these common mistakes:
- Soaking surfaces with too much liquid
- Using vinegar on touchscreens or leather
- Scrubbing stains instead of blotting
A quick weekly wipe down keeps grime from building up.
| Task | How Often | Time |
|---|---|---|
| Vacuum seats and mats | Weekly | 10 min |
| Wipe hard surfaces | Weekly | 5 min |
| Clean glass | Fortnightly | 5 min |
| Deep clean seats and carpet | Every 3 months | 60 min |
| Check cabin filter | Every 6 months | 10 min |
Keep a small kit in the boot: a microfiber cloth, a spray bottle, and a soft brush. Ten minutes a week saves hours later.
Frequently Asked Questions
What is the best non-toxic car interior cleaner?
The most reliable option is one you mix yourself: 1 cup of water, 1 tablespoon of mild dish soap, and 1 tablespoon of white vinegar in a spray bottle. It handles dust, fingerprints, and light grease on dashboards and door panels without harsh fumes. For a store-bought non-toxic car interior cleaner, check the label for plant-based surfactants and no ammonia or bleach. Always patch test on a hidden area first, especially on leather and fabric seats.
Can I use vinegar to clean a car interior?
Yes, diluted white vinegar works well on glass, hard surfaces, and mild odours. Mix equal parts white vinegar and water for windows, or 1 tablespoon per cup of water for general wiping. Avoid using vinegar undiluted on leather, because its acidity can dry out the finish over time. It is also not ideal for touchscreens, where a dry or barely damp microfiber cloth is safer. Always wipe dry afterwards to prevent streaks and residue.
How do I clean car seats without damaging the fabric or leather?
For fabric seats, vacuum first, then spot-clean with a mix of 1 cup warm water and a few drops of dish soap, working in small circles with a soft brush. Blot, do not soak. For leather seats, use a dedicated pH-neutral leather cleaner or a weak solution of soap and water, then apply a protectant. Always patch test on a hidden section, and never scrub leather hard, because abrasion removes the top coating and leads to cracking.
How can I remove odours from a car interior naturally?
Start by removing the source: vacuum carpets and seats, wipe down hard surfaces, and replace cabin air filters if they are overdue. Sprinkle baking soda on carpets and fabric seats, leave it for several hours or overnight, then vacuum it up. Place an open container of baking soda or activated charcoal in the cabin for ongoing absorption. For persistent musty smells, check for damp floor mats or blocked drains, since mould and allergens are common causes.
Keeping a car cabin fresh without harsh chemicals comes down to the right tools, correct dilution ratios, and a little consistency. Wide Bay Products makes that easier with carefully selected automotive accessories, free shipping on most orders Australia wide, and friendly service from our family business in Queensland’s Wide Bay region. Add to cart and get the gear you need for a cleaner, fresher drive.